

Thursday, May 1, 2014

Lucketts 2014
 It's hard to believe that it is May already. The Lucketts Spring Market is just around the corner and I thought I would give you a peek at some of the things I have been working on.
Sunday, March 30, 2014
Louis Blue...
 A little ASCP in Louis Blue. It has been the color of the month in the workshop. I picked up these lovely end tables at a thrift shop and I'm so glad I did. They were sitting there in the corner dressed in oak stain. But I took one look at those legs and I just knew they had potential. Like any wallflower they just needed a little attention...I stripped the tops down to bare wood and used a simple white wash . For the lower part it was one coat of ASCP in old white then a coat of ASCP in Louis Blue. Did some sanding and finished it with clear and dark wax...
 A wallflower no more..
Friday, March 28, 2014
Getting Ready For The Spring Market...
 April is almost here and with it comes the Chartreuse & Co. Spring Market. It is a wonderful event in Buckeystown Md. with 6 buildings and outdoor vendors. I'm deciding what to take and thought I would give you a peek . I've made a few signs. Some on canvas and others on vintage wood and old cabinet doors..
 I will have coffee tables
 And lots of little side tables
 and many other lovely items for spring..
The Clock table
 I had a wonderful time in the workshop today. I've had this cute little side table in inventory for some time now. It's one of those little tables with a great shape but for some reason it doesn't have that "Hey Look At Me" presence. As I sat in the work shop this morning I looked over at a photo of a beautiful clock ...Well, that was it.. little miss cutie was going to be "The Clock Table"...I started with a base coat of ASCP in Old White..
  For the boarder I used Amy Howard paint in Black..
 Next.. using a # 2 pencil, I made a circle..It doesn't have to be perfect..
 I then added a coat of ASCP in Louie Blue..During this step you can even out your circle with the blue paint if needed..
 For the roman numerals I sketched them on free hand ..they are not perfectly straight..my hands are not as steady as they use to be, but I think it adds alittle charm..I did have to refer back to my inspiration photo because lets face it, I don't use roman numerals everyday..If you can find roman numeral stencils you can use them for this step.. I always seem to have trouble with stencils so i avoid them...being happy with the spacing of the numbers I filled them in with AH Black paint..
 Sketching on the hands and adding a few more details ( I chose to use Paris and 1887 from the inspiration photo) this cutie is ready to be sanded and waxed..
 I used clear and dark AS wax..I love how she turned out....And now she is ready for the spring market...
Monday, January 6, 2014

Wednesday, December 18, 2013

Brown Paper Packages..
 A table piled high with my favorite things..white and brown craft paper...ribbon... rubber stamps...
 I enjoy making the bows myself.. I collect all kinds of ribbon..new, vintage,linen,velvet..i can never have too much ribbon..
 white craft paper with French script and a velvet ribbon ... my favorite
A Christmas Mantel
 Decorating the workshop and gallery this year I decided to go with a snowman theme...a winter wonderland of snowmen, lots of snow and twinkle lights...
Saturday, October 26, 2013
Transforming An Old Metal Trunk
 An old metal trunk can be very handy. They serve a duel purpose, being both decorative and wonderful for added storage . In bedrooms ,family rooms or hallways you can always find a use for them.
 For this trunk I started with ASCP in Old White, then started adding a cute graphic...
 I love working with paint pens.you can find them in water base or oil...I use both.
 after sanding it's time to age the piece..i use a clear wax to set the piece first, then to age it i use dark wax, dust of ages and gilders paste in black..
 The end result is a lovely trunk ready to grace any room in your home...
Tuesday, October 22, 2013
From Trash To Family Heirloom
 This piece has been a challenge ..but in the end it was worth it..starting out in one direction and ending with something breathtaking..
 It all started with bleed through..which changed everything...after taking the piece down to bare wood and removing some things that had been added over the years I fell in love with what was underneath..
 so I decided to keep it light..
 I stained the top "summer Oak"
 painted the base old white.. added 2 graphics...a French letter..and a lovely crown..
 distressed ,waxed and aged her.. gave her a little extra bling with new knobs.. and I must say I am in love...she will be at the Lucketts holiday market on Nov. 8-10...
Friday, October 18, 2013
The Dreaded Bleed Through
Each piece I work on is different..I never know how it will turn out..So many things can affect the outcome...none more bothersome than Bleed through..you prep the piece, and put on a few coats of paint and after awhile this ugly stain comes peeking through...at that point I have to decide...do I work with it, or change direction.. for this piece I decided to change direction..so I took it down to the bare wood... stained the top..and i'm going with old white..i think this is the direction she wanted to go in all along...The Making Of The Haunted Manor
 Simple enough, it all started with a poem.
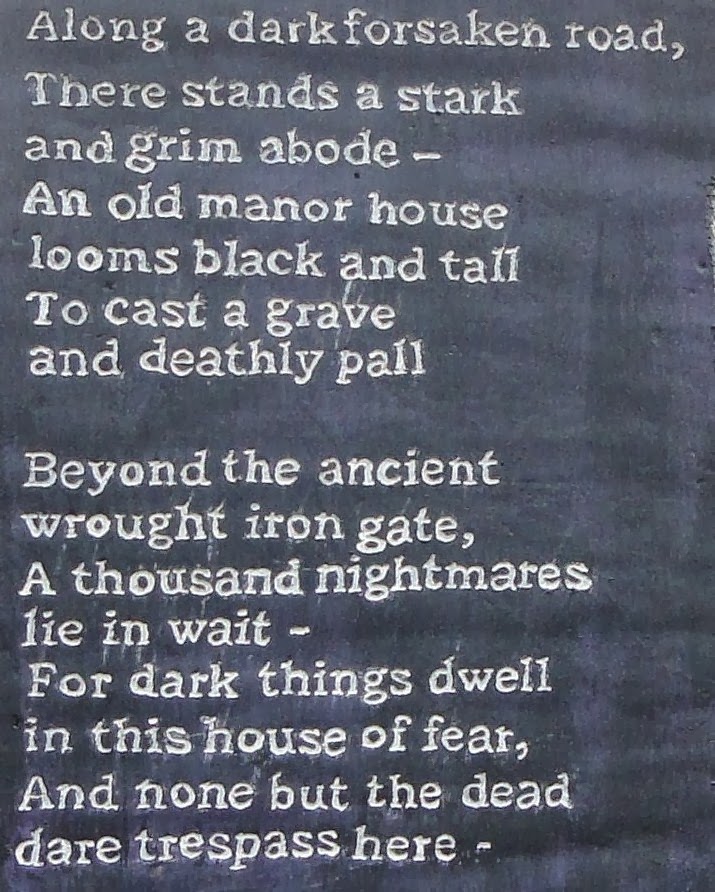 I wanted something different..it had to be special
 So I allowed my artistic abilities to run wild
 It was going to be over the top..
 every detail..

 real lights sit atop the columns
 each brick was hand carved...and hand painted..
 Halloween at our house is a huge production and I would not have it any other way..I've been told the Manor has become a destination on Halloween night,Families out together..grandparents taking pictures...how wonderful..
Wednesday, October 16, 2013
A Holiday Banner
 I love making holiday banners, so I thought I would share how I make them..Supplies..Ruler, scissors, grommet kit,card stock,pencil,craft fuse iron on backing,fabric( for this project I use a drop cloth as my fabric). iron, hot glue gun, glue sticks, liquid stitch,glitter glue,glitter,ribbon
 I make a pattern from a piece of 8.5 x 11 card stock. the middle of the card stock is 4.25..make a little mark
 from that mark use the ruler to draw a line to the bottom corner,
 do the same for the other side. then follow the line and make your cut.
 take a piece of fabric(a little larger than 8.5 x 11) and iron on a piece of craft fuse.( follow directions on the back of the package).after you have applied the craft fuse place your pattern on the fabric and trace your pattern.
 cut out the fabric..
 I am making several different banners for several holidays.. but for the Halloween banner I need 3 pieces to spell out the word Boo..I decide what I want on the banner and start drawing ..you can use stencils if you do not want to try it free hand..
 after I have my design completed, I add my grommets..
 for this banner I am going to use glitter for the letters.. so I apply glitter glue to my design and sprinkle on the glitter..
 not bad..this will need to dry for a few hours..
 after the glitter has dried it's time to decorate the banner..i love using scrap pieces of ribbon and trims..( I save everything, no matter how small)
 and here is my finished piece..i love it..
Subscribe to:
Posts
(
Atom
)


 Posts
Posts


